
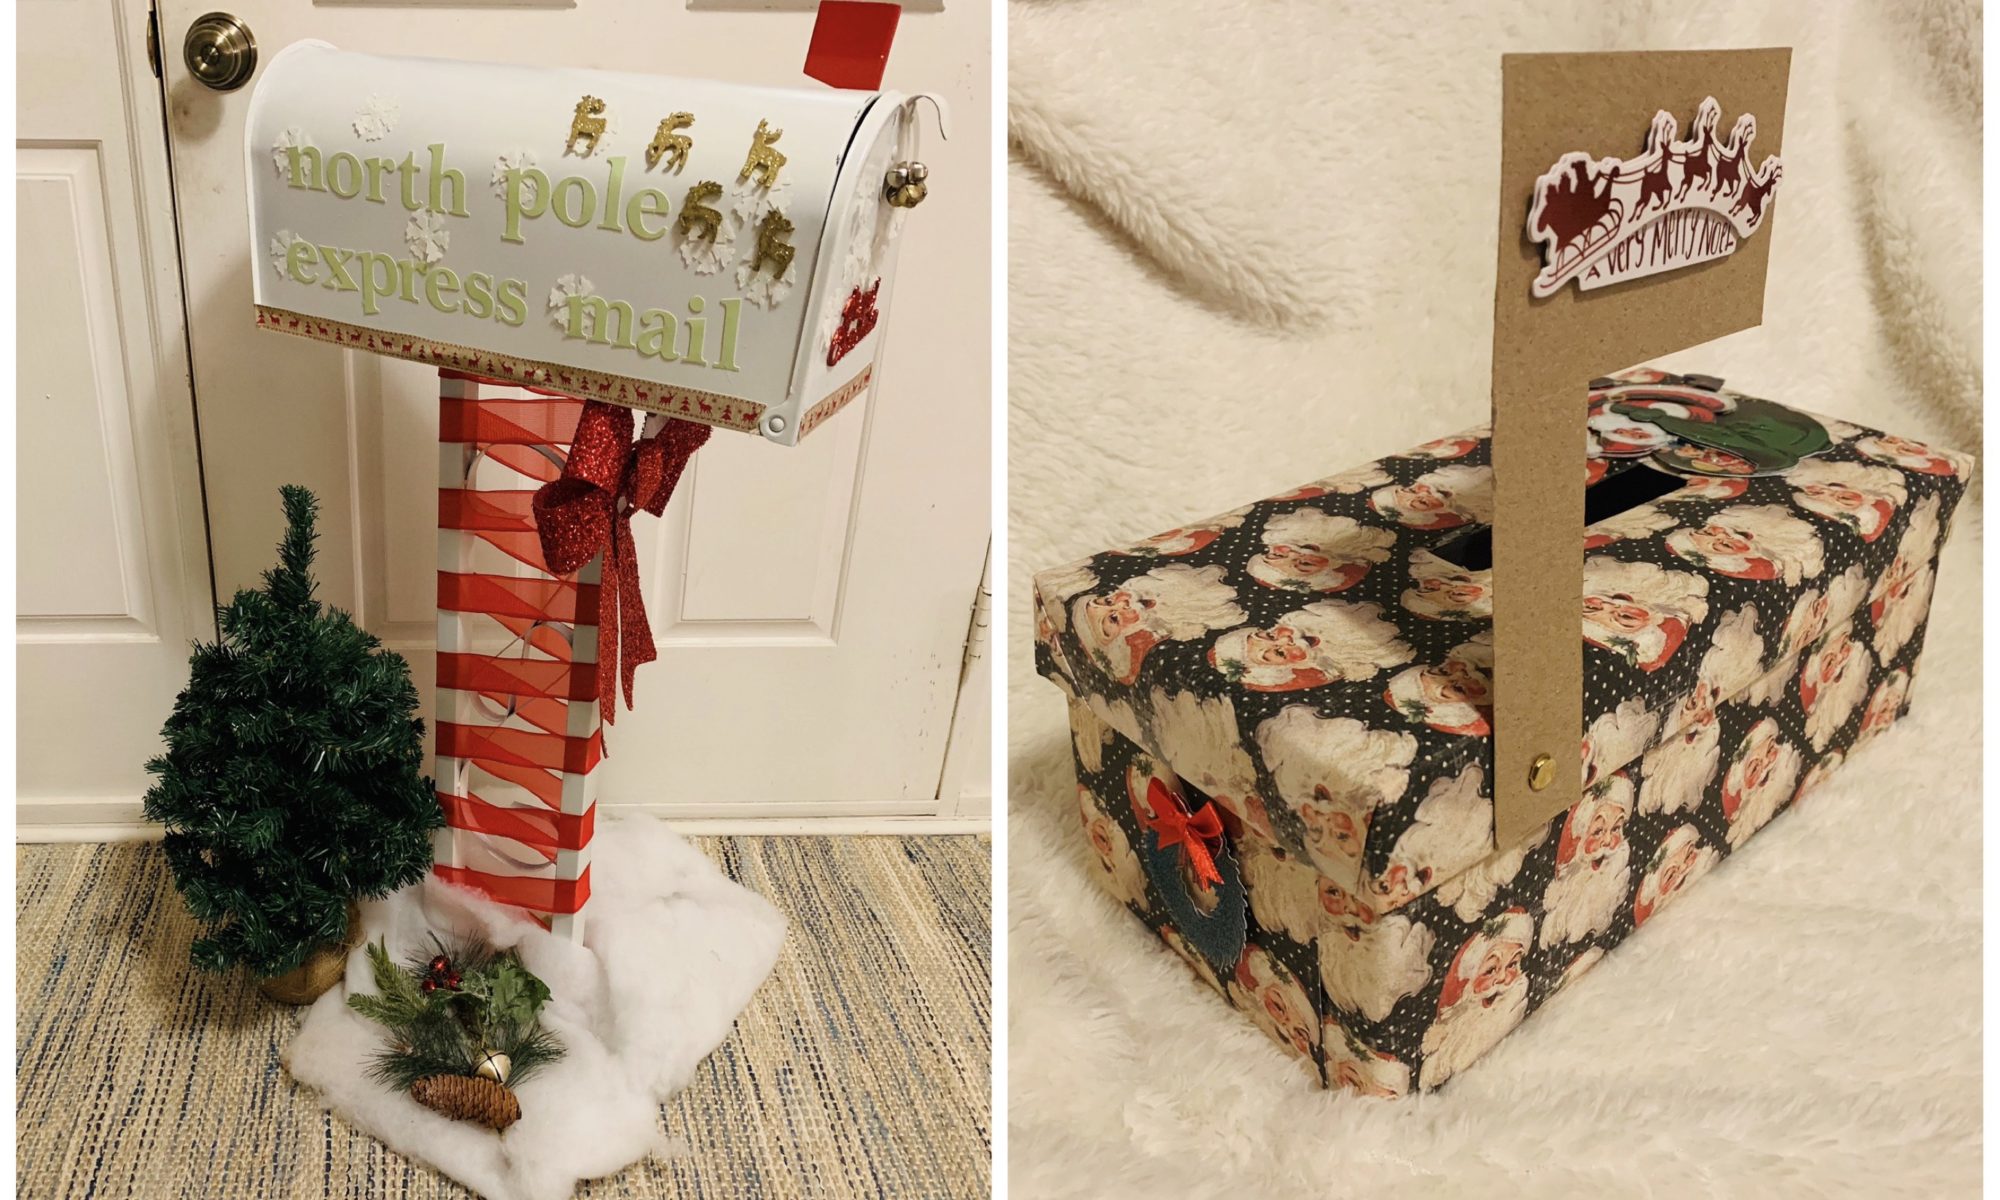
Plenty of towns have cute mailboxes set up for Santa mail where your child can send their letter to the big man. The only downside of that is you, as a parent, don’t get to keep and cherish those precious letters. Solution? Make your own mailbox! The great thing about this DIY is that you can make it as simple or extravagant as you’d like. I’ll be giving you two options to make. Choose which one works better for you!
For a Shoebox Mailbox you’ll need:
- A shoe box or any sturdy cardboard box. Craft stores are full of festive storage boxes this time of year which also means less decorating for you!
- 1 brass paper fastener
- Wrapping paper
- Thick scrapbook paper (for flag)
- decorative accents and embellishments (jinglebells, holly branches, ribbon, etc.)
Directions:
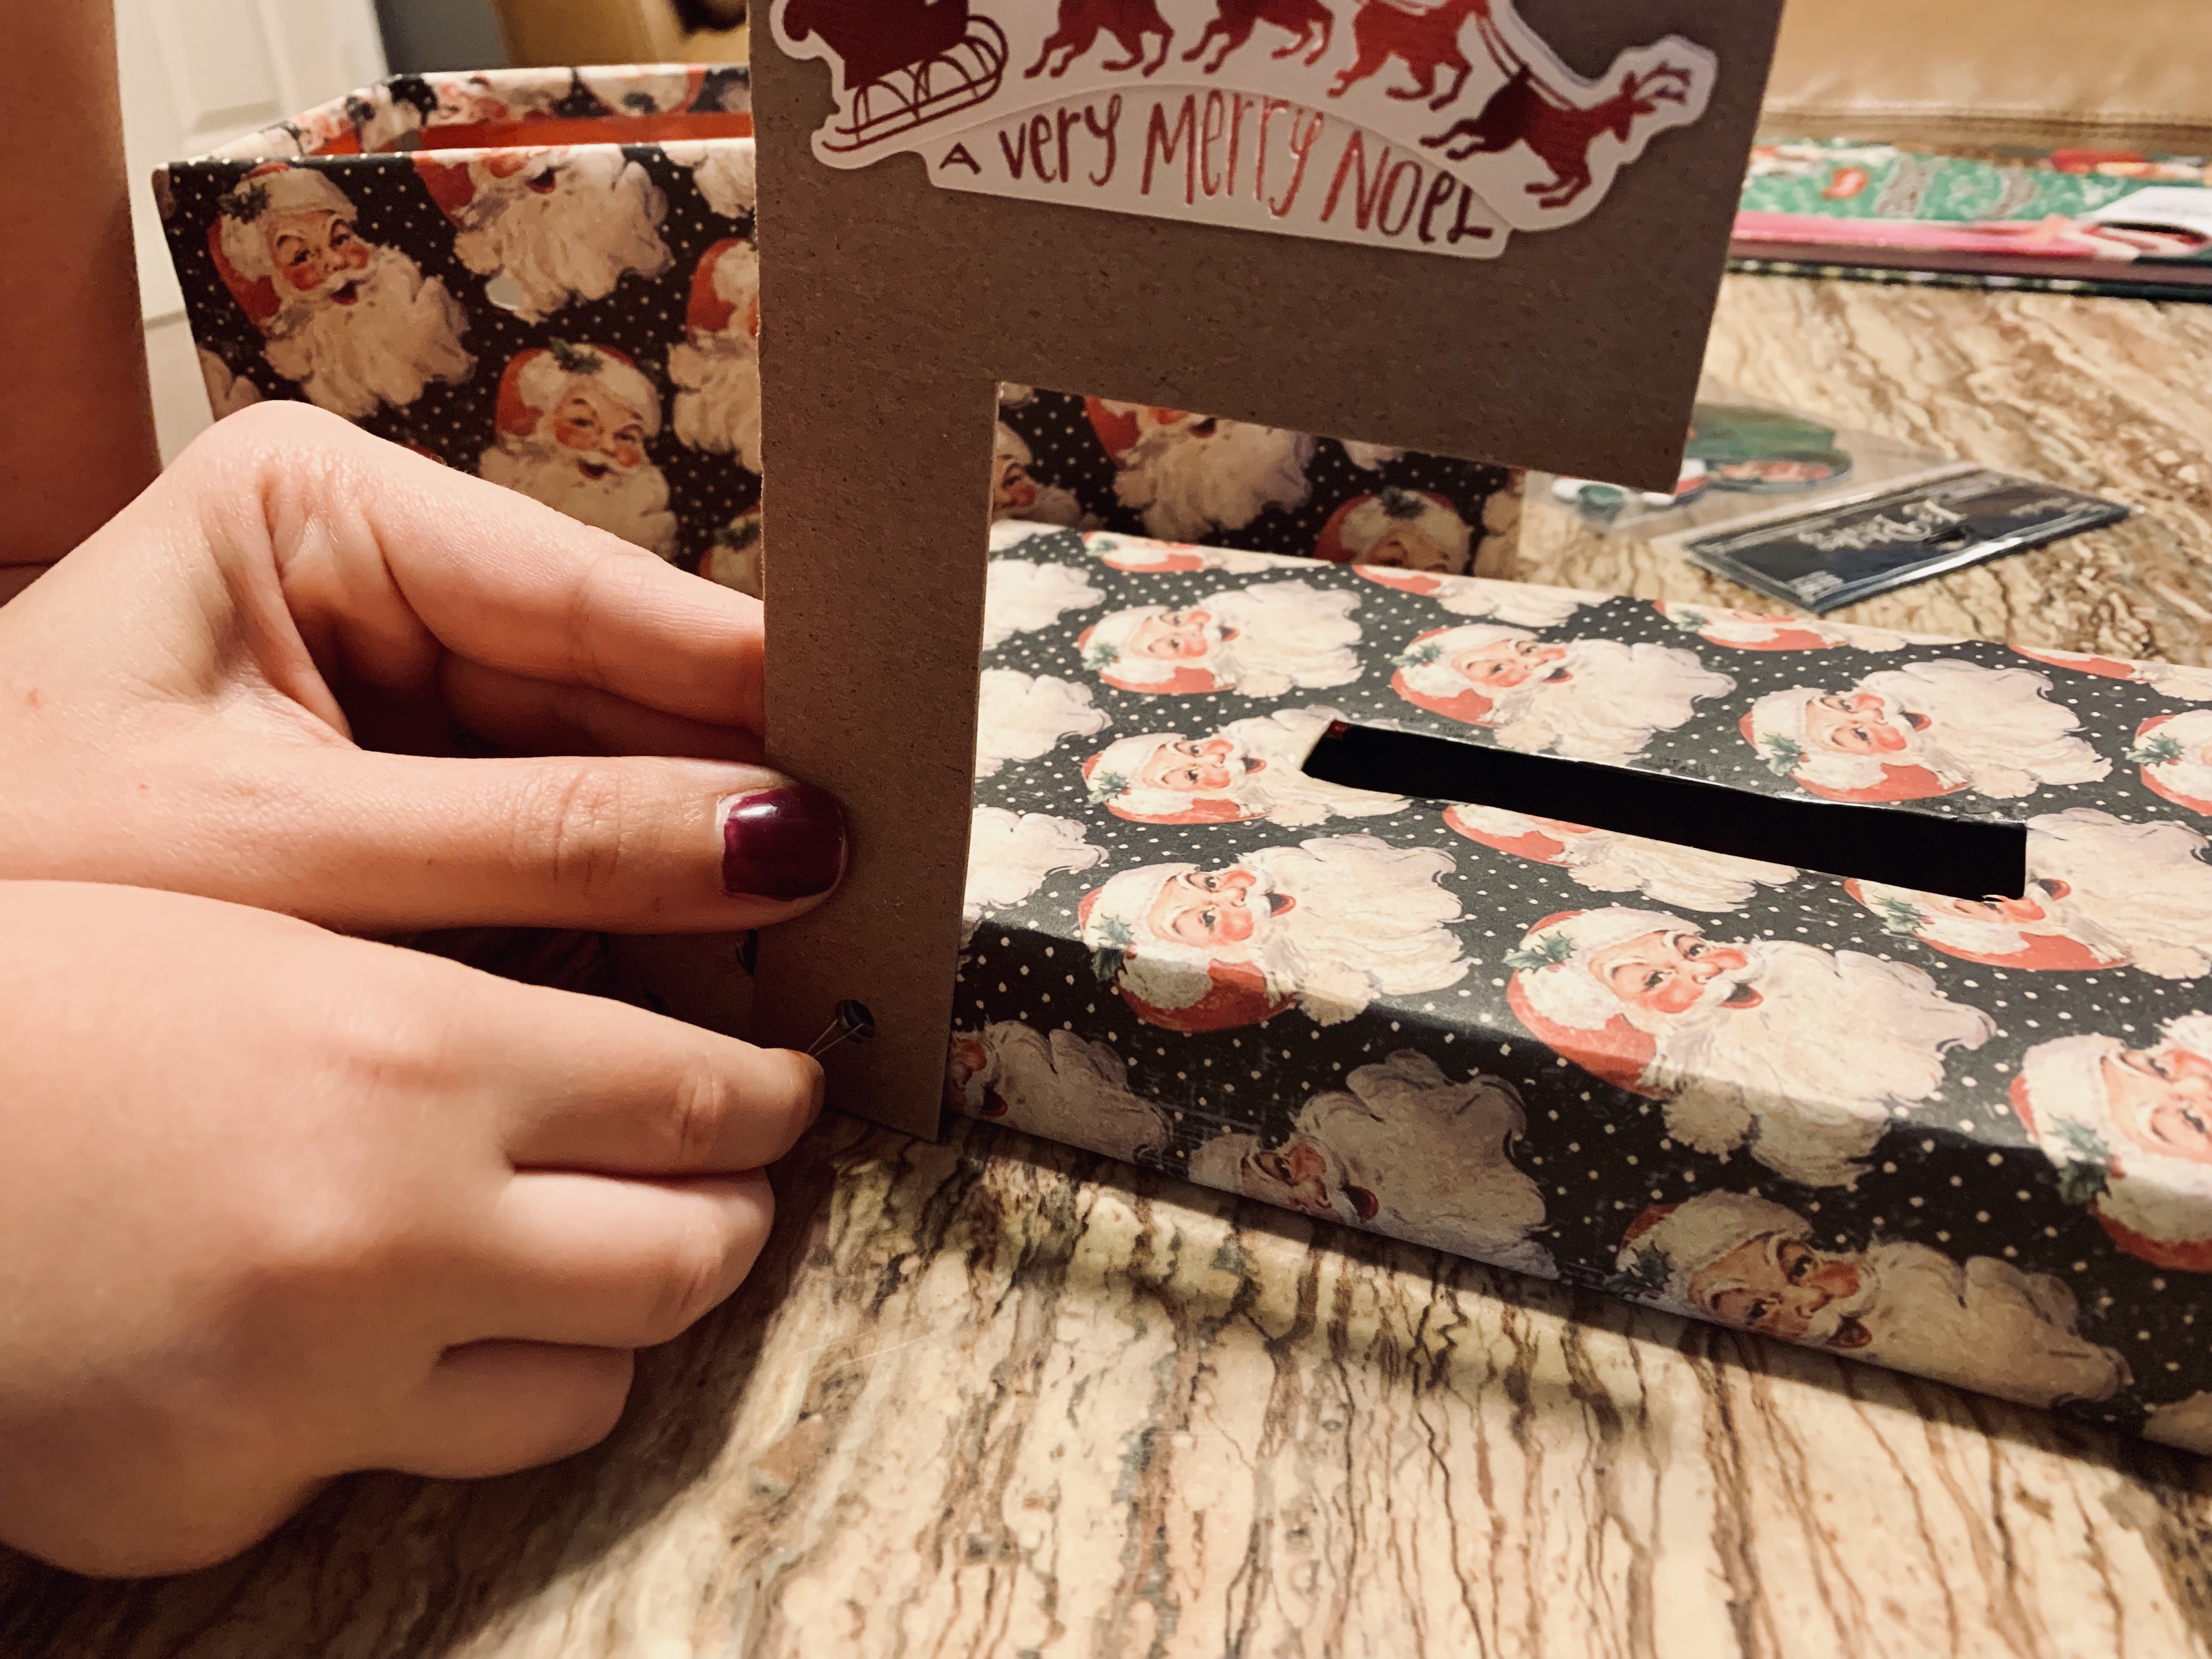
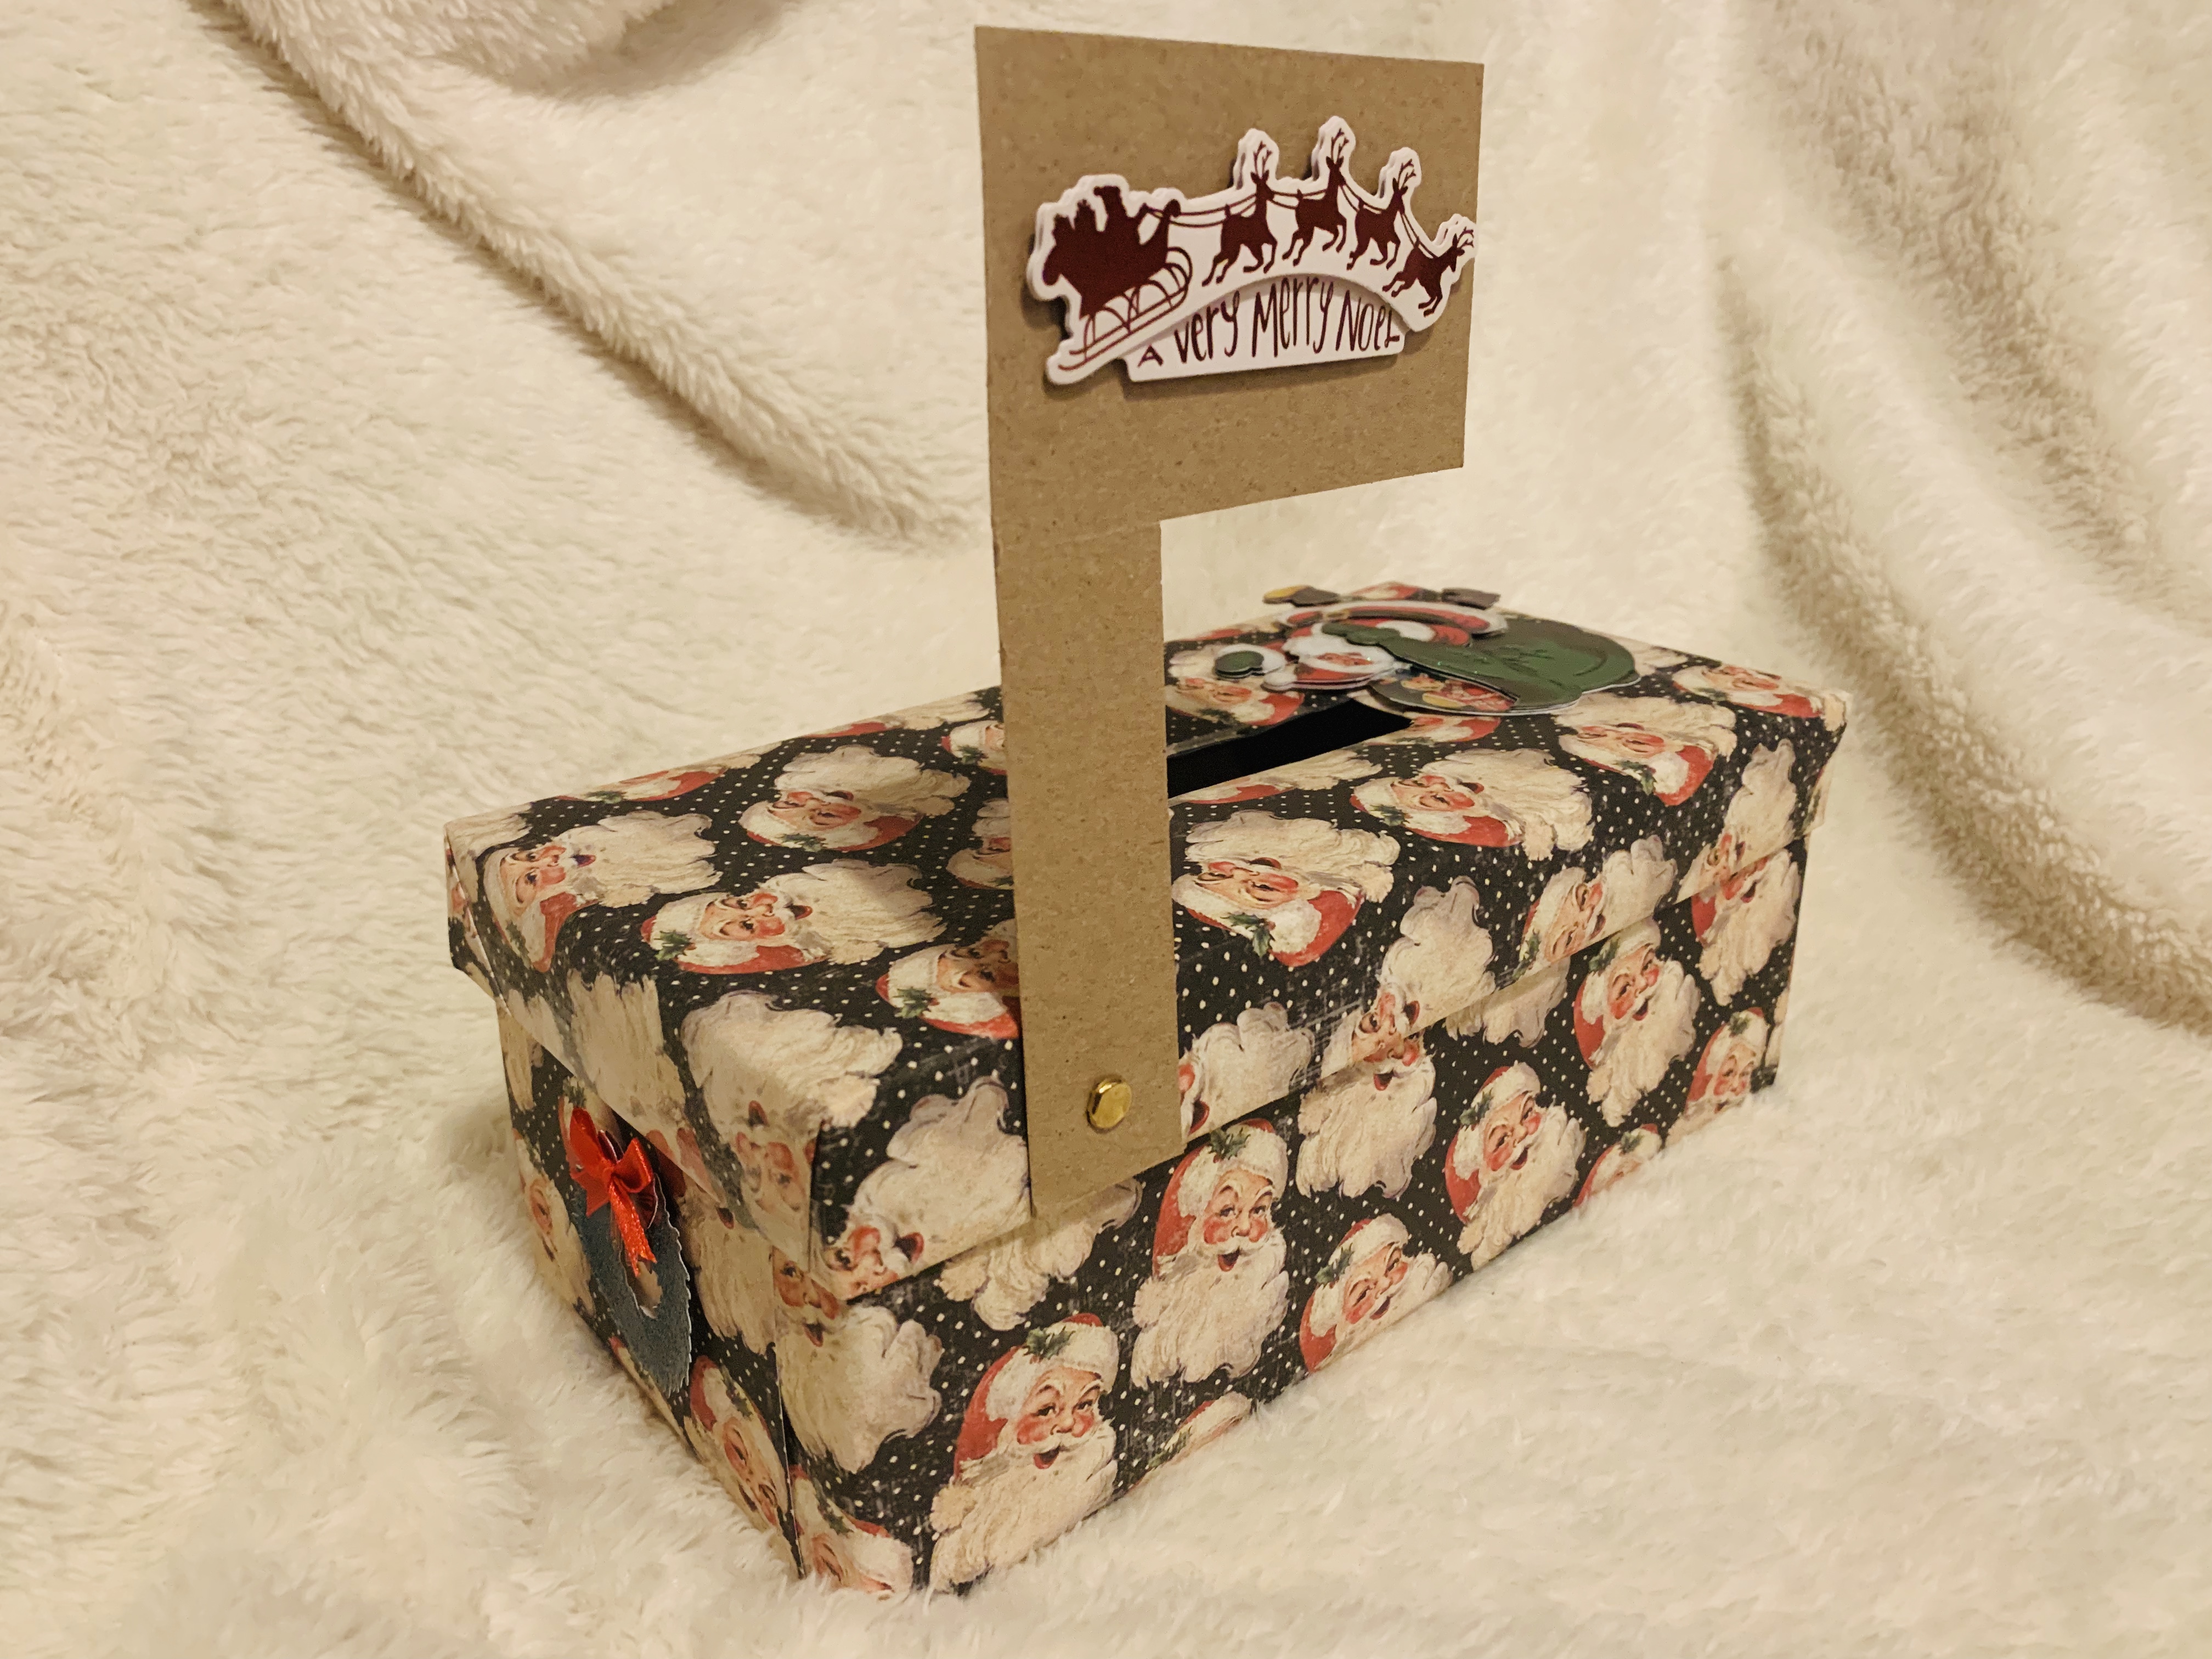
- Using an exacto knife cut the mail slot into the lid of your box. You want this slot to be wide enough to fit some fat letters but not so wide that you can peer inside.
- Using the wrapping paper wrap the box and the lid separately so you can remove the lid easily to access the letters without ruining your wrapping.
- Using your exacto knife again, cut the wrapping paper on the lid to match the mail slot you cut in step 1.
- Using the exacto knife, cut a small slit through the box and wrapping paper. This will be for the brass paper fastener to fit through so it should be very small.
- Cut out a little mail flag using thick scrapbook or cardstock paper and using a whole punch or exacto knife, cut a small slit into the base of the flag.
- Poke the paper fastener through the base of the mail flag and through the hole you cut into the box. Open the fasteners on the inside of the box. Your flag should easily move up and down to indicate to Santa that there’s mail!
- Add any embellishments and decorative accents you’d like!
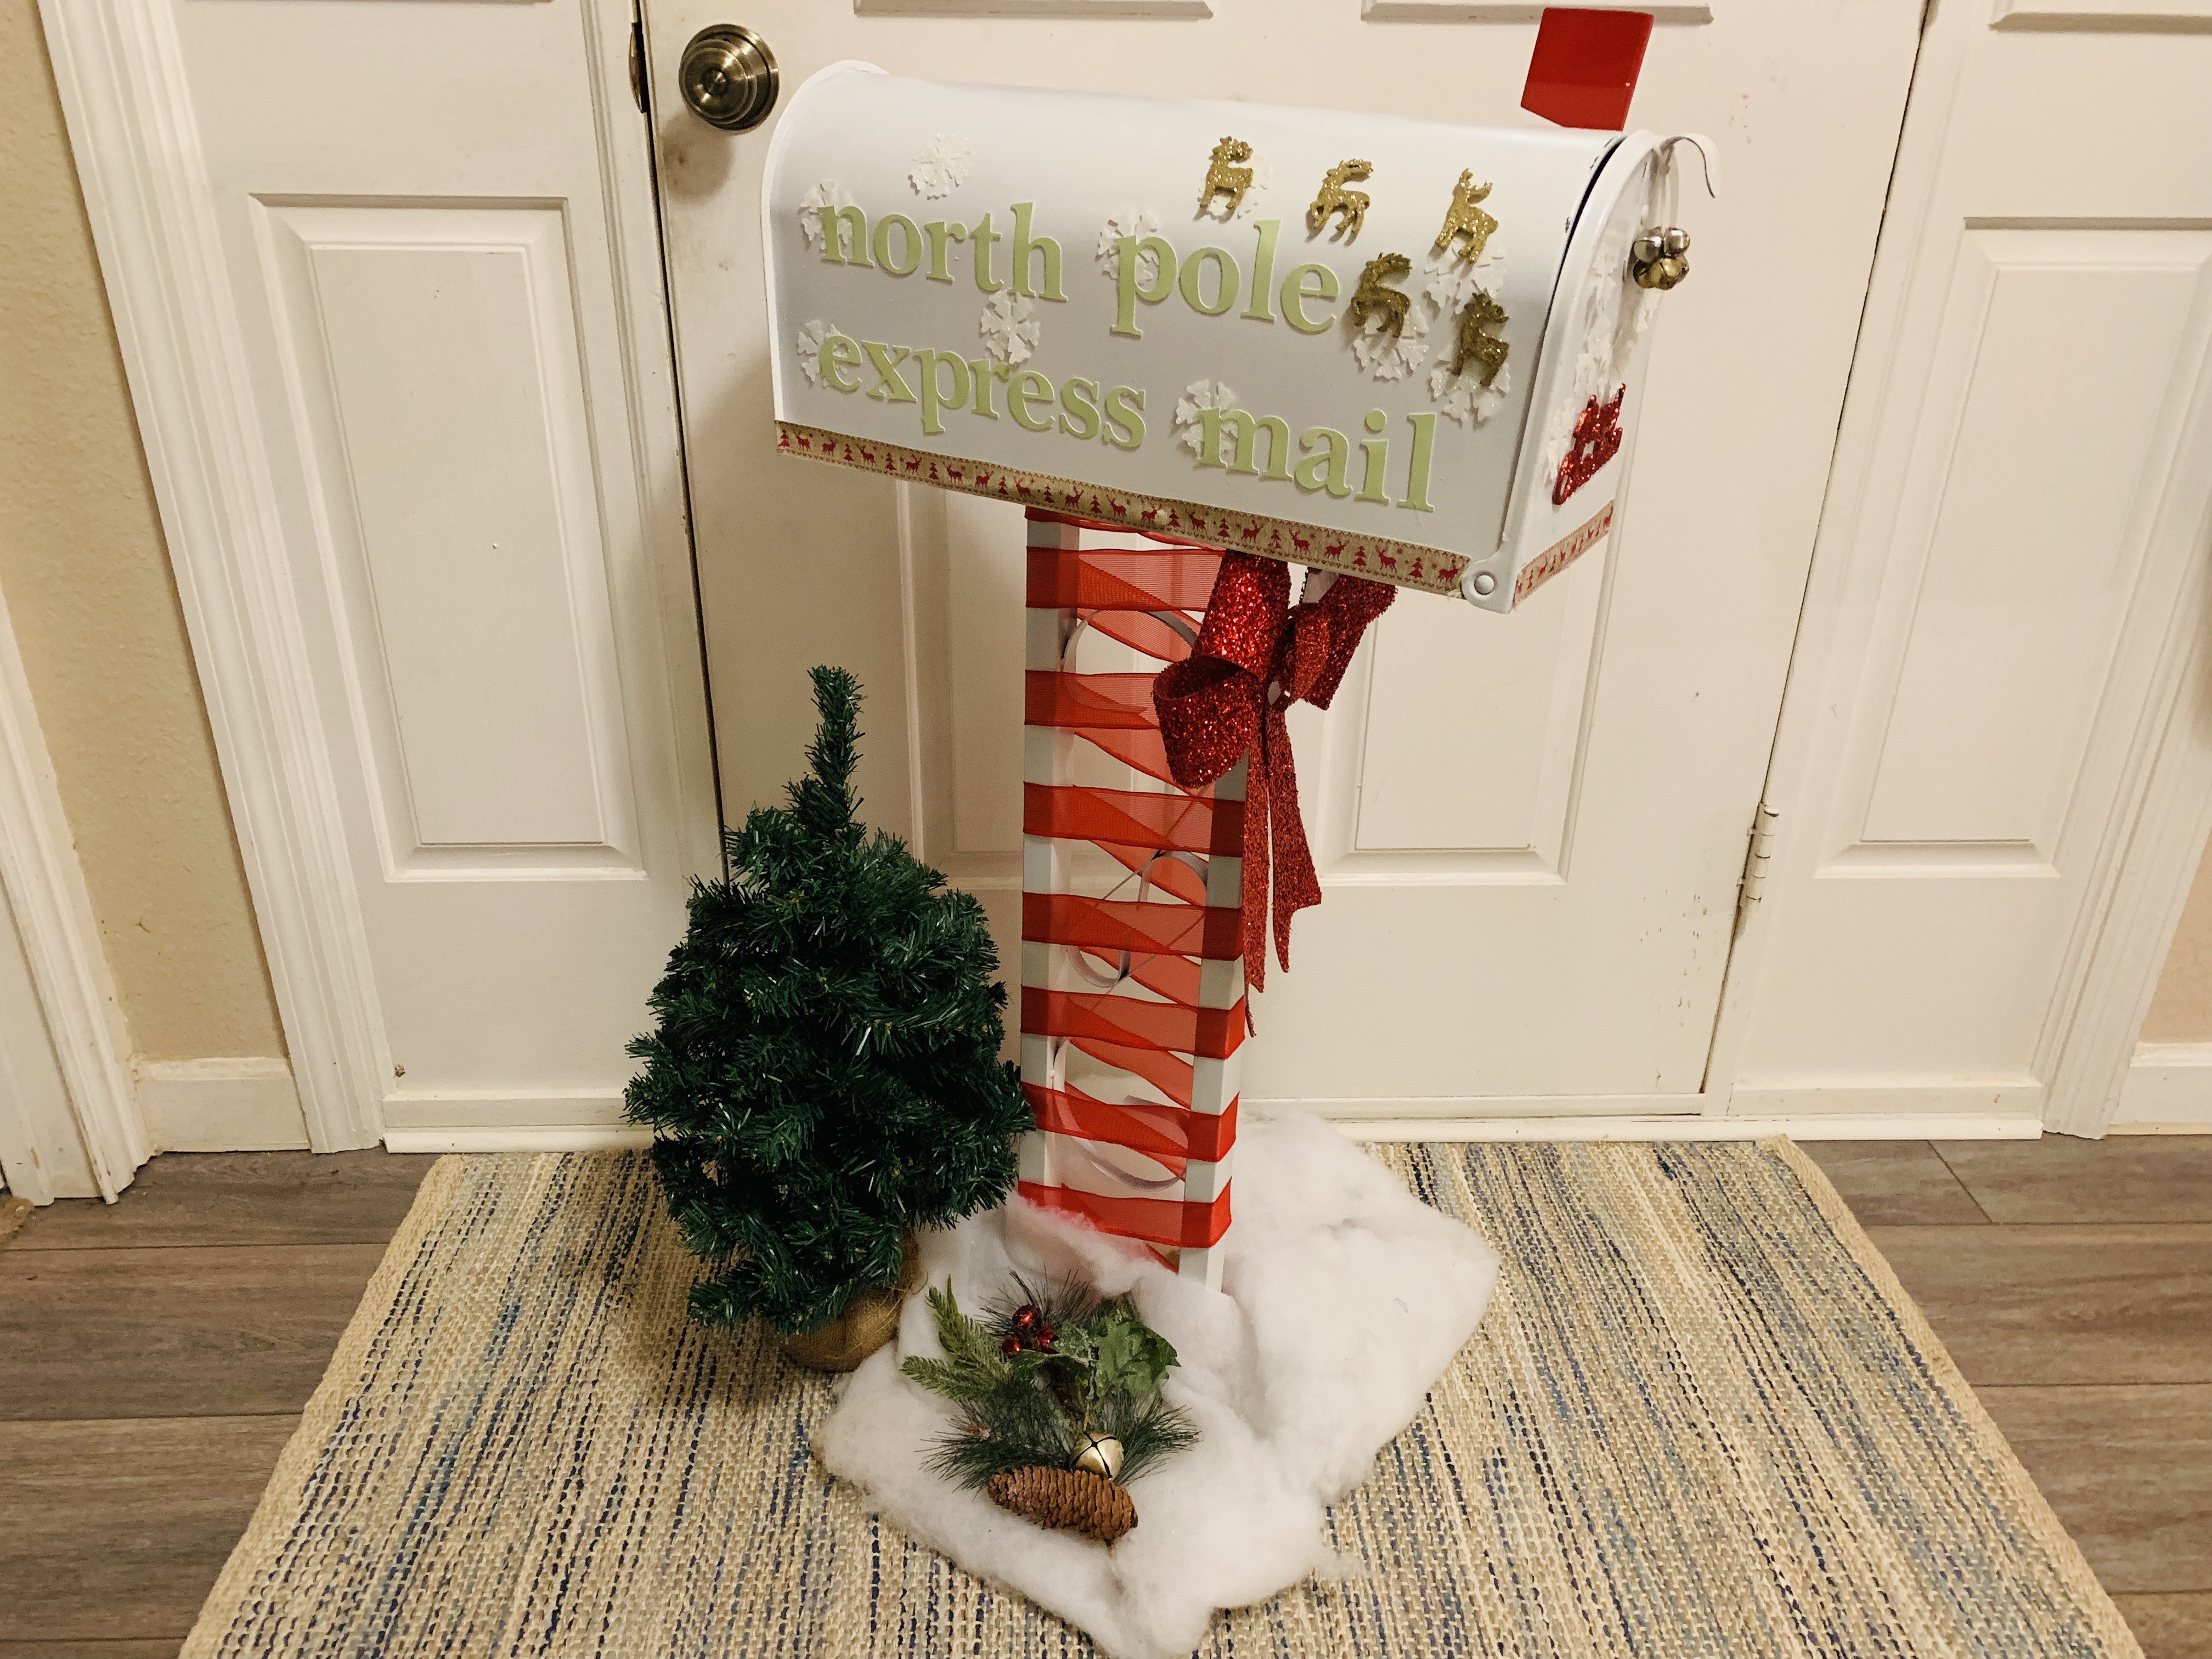
For a metal Santa Mailbox you’ll need:
- A metal mailbox from your local hardware store. Don’t worry about the color as you can paint it however you’d like. We found ours on sale and it was black. 5 minutes and some spray paint later, we had the mailbox we wanted.
- 11×16 piece of wood (for base)
- 4 L brackets
- Decoratice accents and embellishments (ribbon, bells, etc.)
- Spray paint if you want to change the color of your purchased mailbox.
- Fake snow for base of mailbox
Directions:
- Paint your mail box your desired color. We went with white but red, gold or silver are great festive options as well!
- Assemble your mailbox however you’d like it. We decided to attach the base and have it free standing but you can certainly just have the box sitting on a table or furniture piece in your home.
- If you choose to have your mailbox freestanding, attach the stand that came with your storebought mailbox to the 11×16 piece of scrap wood using the L brackets.
- Start decorating! Add your ribbons, fake snow, jingle bells, etc and make it your own!
Whichever mailbox you choose to make, bring the magic! We never let our kids see us bringing out our mailbox. They wake up one day and it’s magically downstairs waiting for them. Jack full-heartedly believes that Santa’s elves deliver this mailbox every year so Jack and Santa can communicate. He draws pictures, we help him write letters and it all goes in the mailbox. The magic in his eyes when he opens the mailbox the next day to find that Santa has replied is worth every bit of the aresol inhalation we suffered making this Mailbox.
Which did you make? Comment below and share a picture on Instagram tagging us @the.wilke.wayy
Merry Christmas!